My first post! :D
Difficulty: Fairly Easy
(On a scale of: Very Hard, Hard, Fairly Easy, Easy. Very Hard as in the toughest project, and Easy as in the easiest project.)
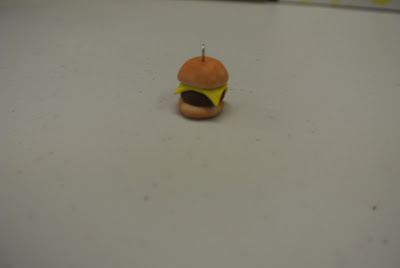
Here is a picture of what the actual charm should (And would! ;) ) look like. This charm was completed by the steps below...
Items needed:
- Blade (Any kind of sharp material, whatever you use to cut!)
- Pastels (Bright Yellow, Brown, Brick Red, Sand-y color)
- Polymer Clay (Of course! Yellow, Translucent, Beige, and Brown.)
- A paintbrush (Which is not in this image!! Sorry!)
Step 1:
Take the Beige Clay and roll it into a log. Don't worry if you have lint or anything else in it, it won't show up when it's finished. (Hakuna Matata! C: )
Step 2: Take the blade that you have and cut it in two sections- One slightly larger than the other. This picture kind of exaggerates the whole idea of it; what makes up the top bun (The left section, or the bigger side) is a little bigger than what it needs to be, so I took some clay off of it later on when I realized this
Step 3: Roll the bigger section a ball and flatten down the sides (Like a small dome). Take the smaller section, roll it into a ball as well, then completely flatten it. Note it can't be too flat.
Step 4: This is where the pastels come in. In this picture, the colors are going in a certain order, and are a certain size. The order is Bright Yellow, Sand, Brick Red, and Brown. Starting with Bright Yellow as the largest amount, and Brown as the least amount.
Step 5: Mix all the colors together with a paintbrush. Be careful, this could get pretty messy. Just make sure you clean your hands before touching the rest of your clay. No kidding when I say now that it will and can stain clothing, several kinds of surfaces, and your clay. But after mixing it together for a while, the colors will go away.
Step 6: Take the little dome (Or the top bun! :B ) and brush on the mixed colors to make a 'baked' effect. Start at the top and make your way down, becoming lighter and lighter as you go. I'll mention this now- I used Beige because the way the pastels shade it looks better than normal brown clay. But that's only my opinion.
Step 7: Repeat the process with the bottom piece, only without the 'lighter and lighter as you go' thing. Try to make the sides and bottom look the same- just don't bother shading the other side.
Step 8: Take your Brown clay and roll it into a small log (As shown). Squish it flat just like how you did with the bottom bun earlier. Try to make this the same size as said clay bun, because this will be the meat of the little cheeseburger.
Step 9: Get your Yellow clay out and squish it very flat- Very flat. Cut out a little square from the clay and pinch the corners so that they just barely hang downwards. (You'll see what I mean in the next picture.) This is going to be the cheese.
Step 11 (And final): Place the top bun on the burger, add an eye pin, and bake! Now your tiny delicious looking cheeseburger is complete! :)


No comments:
Post a Comment